The
long wait is finally over and blogger has come up with it’s own contact
form. Now you no longer have to rely on 3rd party Contact form
solutions. Blogger has added a new Contact Form Widget which will fit
into your Blog’s sidebar. You can also add the same contact form on a separate page and customize it if you want to.
Adding a contact form to Blogger is now really easy. Below steps will guide you in adding the contact form as a sidebar widget.
Why should I add the new Blogger Contact form
Visitors can easily drop a message to you straight from your blog.
You don’t have to reveal your email address to the web to provide users
with an option to contact you.If you like getting suggestions, queries
or any other feedback from the users, make sure that you add the contact
form to your blog. It’s really easy to add the form and doesn’t require
any 3rd party code to be added to your blog.It also makes it really
easy for your blog readers to contact you directly.
How to add the contact form to Blogger
Login to your Blogger Dashboard and Navigate to the
Layout Page
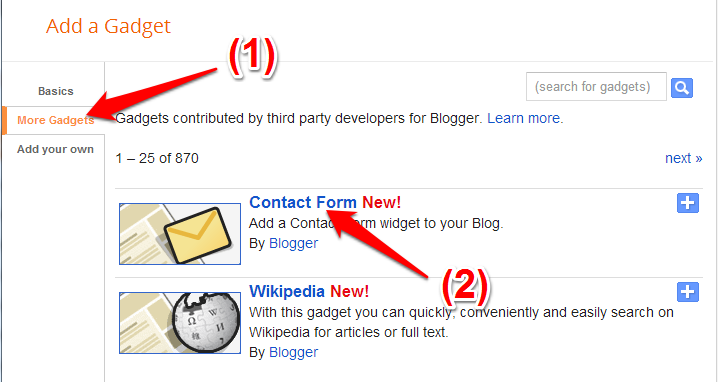
Click on the
Add a Gadget Link and select
More from the left Menu. You can add the add the brand new contact form the right side list
You can set an appropriate title for the Gadget and
Save it.

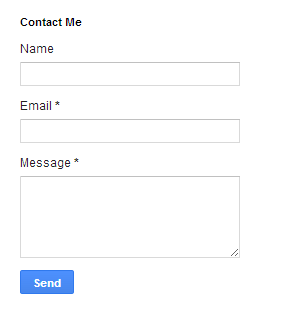
Once it’s done, you should see the slick and clean Contact Form
widget added to your blog’s sidebar.The contact form has the below input
fields
- Name – Name of the reader who is sending you a message
- Email – Email address of the reader who is sending you a message
- Message – The message which the reader wants to send to you.
- Below is the screenshot of the Contact Form Widget added to one of my test blogs.
The Contact form has validations in place and error messages will be
displayed in case the user misses out the email address or message.
Though the form doesn’t have any captcha validation,it is less likely to
be attacked by spam bots as the send button is triggered by JavaScript.
When the reader sends you a message via the contact form, you will
receive it straight in your inbox. Copies of this message will be sent
to each admin user of the blog. Below screenshot will give you an idea
of how the message will look like.
You can directly reply back to to the sender from you email. If you
want to move the Contact Form to a separate page, then checkout the tutorial on creating a separate contact page for blogger.
You can change the look and feel of the contact form by altering the
CSS styles. We will try to publish another tutorial which will help you
in customizing the contact form. You can see a slightly customized
version of the contact form widget on our Contact Page.
If you have any further queries on adding the contact form, do let us
know and we will be happy to help. You can reach us via comments or the
Forum
Happy Blogging Tips!

